
This tutorial will show you how to add any Body Hair prop to Genesis 9. We will cover the following Daz Studio skills:
- Parenting a Body Hair Prop to Genesis 9
- Adjusting Parameters
- Eliminating Poke Through with the Geometry Editor
- Perfecting the look with the Geometry Selection Tool
With every new character Generation for Daz Studio, there is an increased emphasis on realism. 3D artists expect photorealistic skin, hair and clothing that reacts to light perfectly. But one area that seems to have been neglected so far for Genesis 9 is Body hair! After all, we can’t have ultra realism without it! So we have created this quick and easy tutorial to help you add some hair effects to your characters.
Adding Genesis 9 Body Hair
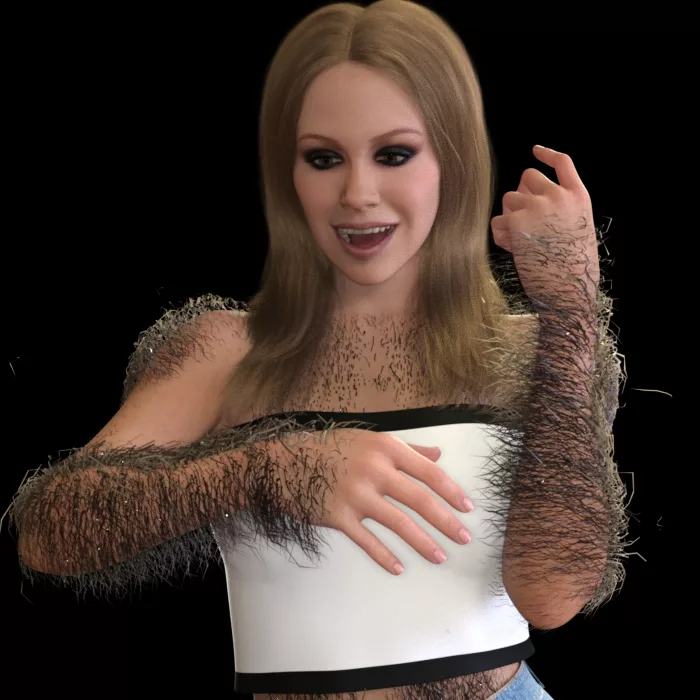
At the moment, there are no stand alone body hair props available for Genesis 9. But the good news is that we can quite easily add hair from older characters to Genesis 9. In fact the character in the promo imagery is sporting the George Hair Set with the length dialled up to a ridiculous amount for comedic effect! This hair prop was created for Genesis 3 and it didn’t require much effort to create an interesting look. Here is a quick step by step guide on how we achieved this look.
1. Parenting a Body Hair Prop to Genesis 9
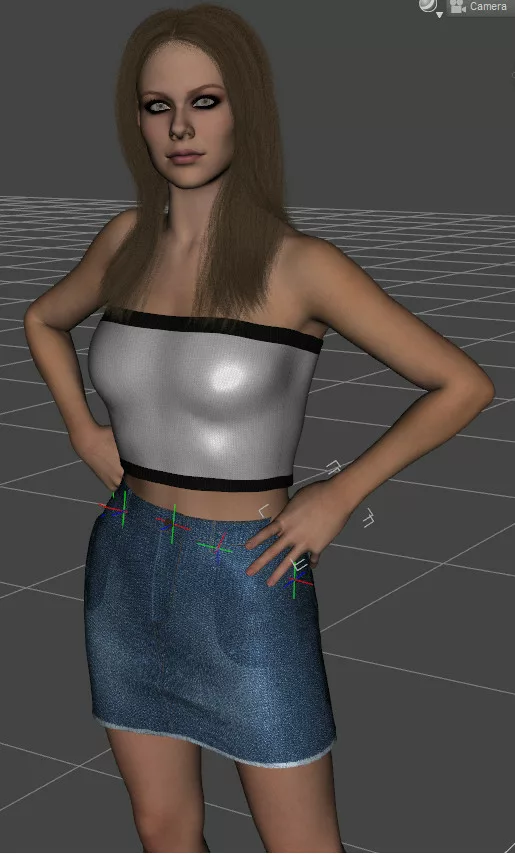
First load a Genesis 9 figure into your scene. We are using the beautiful HID Ariel. If you like this character you can read our review of her here. She is also wearing clothing from the dForce HnC Cropped Denim Jacket Outfit.
Next add a body hair prop from your library. For this tutorial we will be using the George Hair set created for Genesis 3 Male.
Please note:
- You will need to deselect you Genesis 9 figure so you can search your smart content library for the hair prop.
- Once you have found it in your library, you can then click on your Genesis 9 figure.
- Finally double click your hair prop to auto parent it.
If you have followed the steps above you will be greeted with this dialogue box:
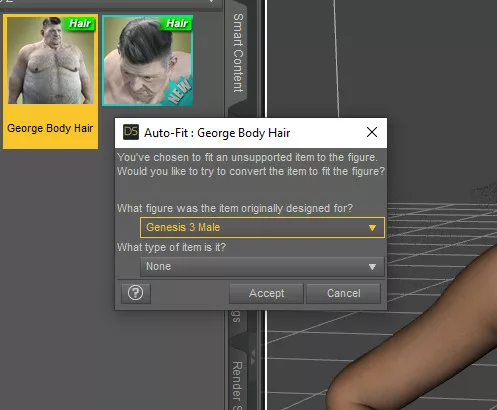
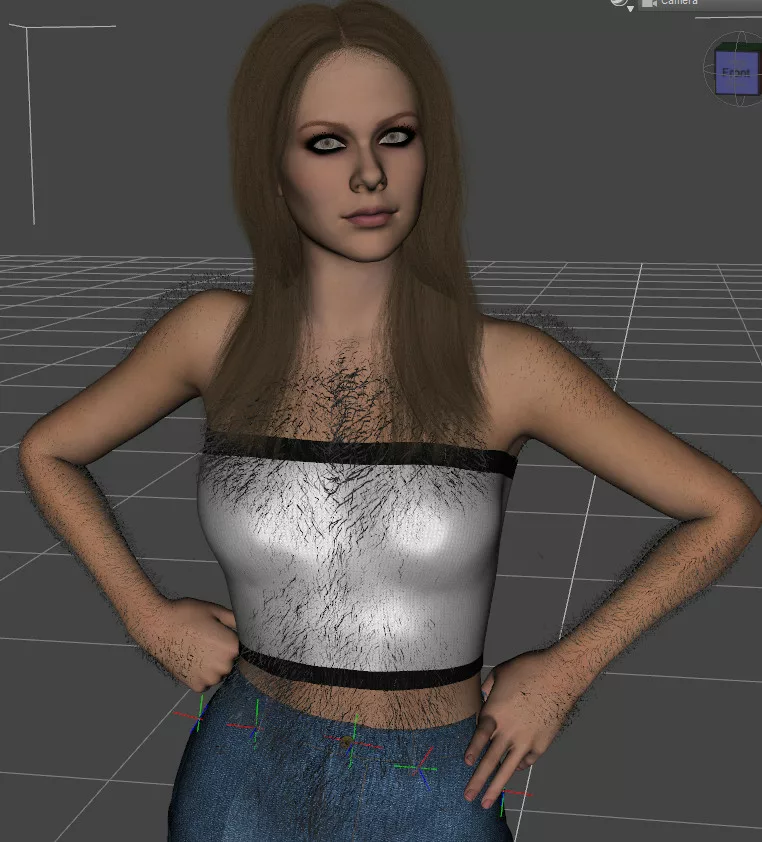
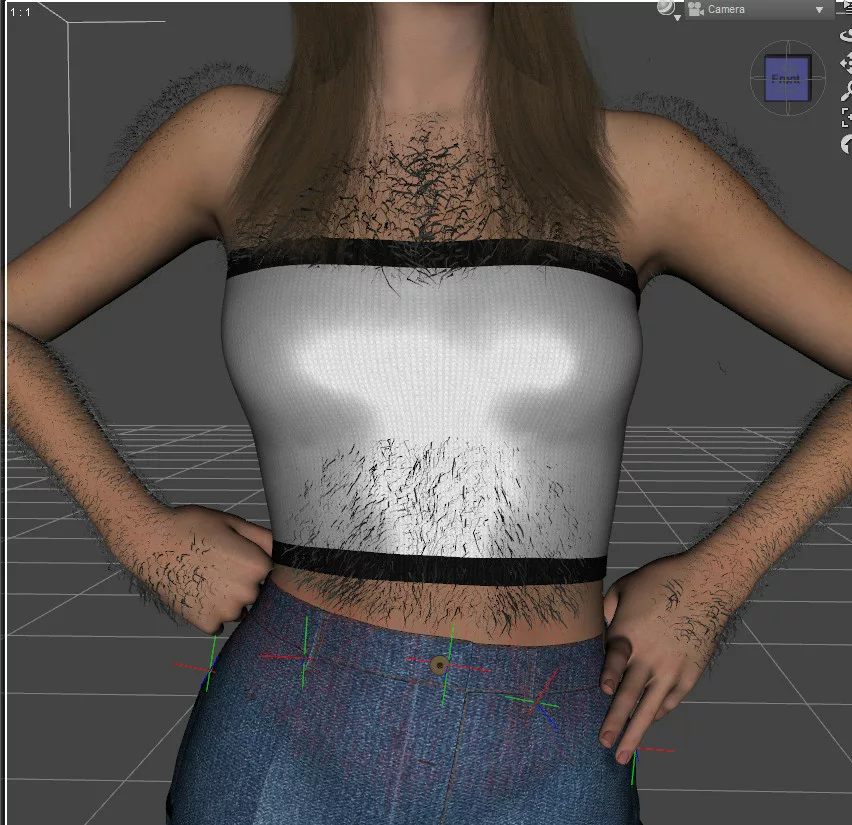
Select Genesis 3 Male and leave the item type as None. Now we have our hair prop parented to our figure. But this look is not good! We need to prevent the hair from poking through clothing.
2. Adjusting Parameters
Depending on the hair prop you are using, there may be some sliders available to hide various parts of the hair prop or reduce the hair length. You may also be able to alter the shape of the hair and the effects of gravity. Some props also feature Geometry Shells that can interact with clothing layers automatically. In our case we have these sliders available:
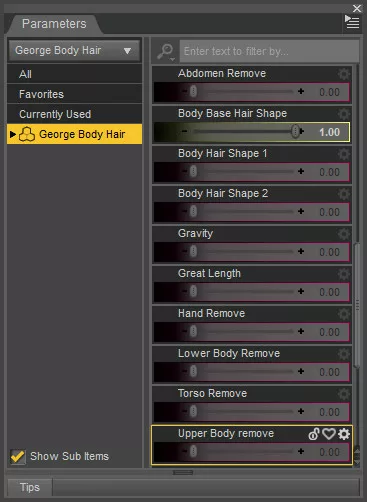
Unfortunately there aren’t enough options to remove hair from the clothed areas, without leaving huge bald patches! But fear not, we have a tool that we can use to get a perfect result!
3. Eliminating Poke Through with the Geometry Editor
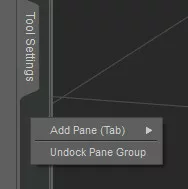
First make sure you have the Tool Settings pane open in Daz Studio. If you need to open it, right click in an empty area near the other pane tabs and select Tool settings from the sub menu.
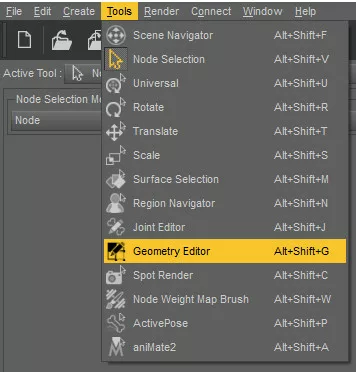
Next open the Geometry Editor. You can find this in Tools -> Geometry Editor or use the short cut key Alt+Shift+G. When you open the Tool Settings Pane you will be able to see the Geometry listed for anything you have selected in the scene.
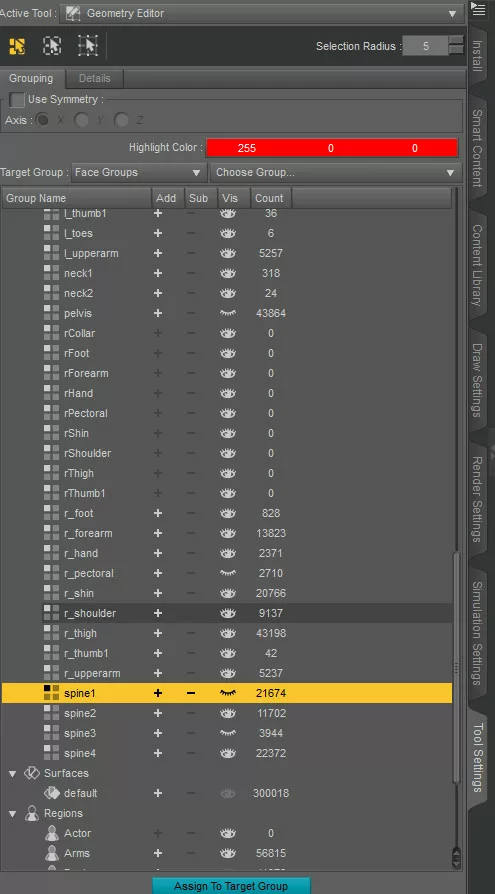
Go ahead and select your hair prop and take a look at the Tool Settings pane. In our case we have the George Hair Prop selected. Depending on how the content creator organised their Geometry, you will see various sub menus such as face groups, surfaces and regions. In our case we are going to focus on the face groups menu. From here we can turn any part of the hair model off as we wish! In the image below you will see you the different parts listed. Simply click on the eye symbol to turn them off from your scene. We have turned off the following face groups: pelvis, spine1, spine3, l_Pectoral and r_Pectoral.
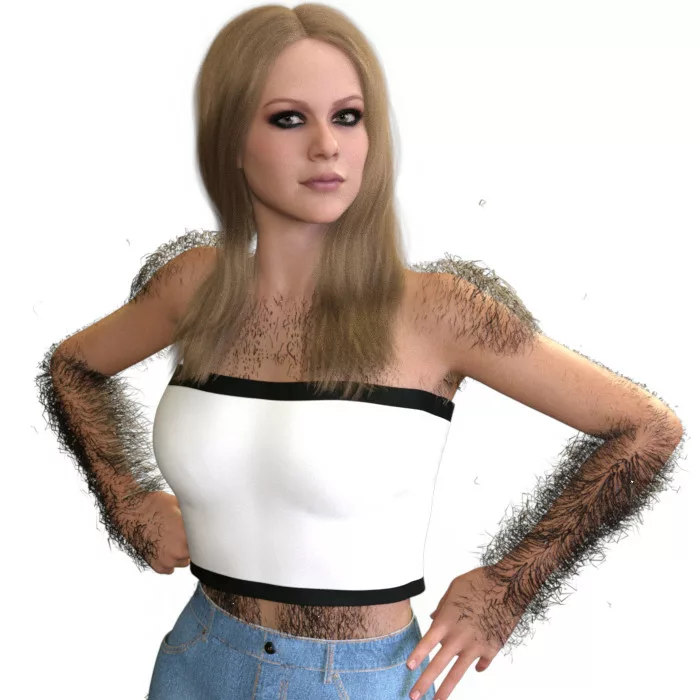
Here are the results so far. The amount of poke through is improved but still not perfect.
We have one final trick up our sleeves to get the perfect look!
4. Perfecting the look with the Geometry Selection Tool
If you read our dForce hair tutorial, we covered manually selecting Geometry whilst using the weight map tool. We are going to do the exact same thing, but this time we are going to hide the selected polygons to get rid of any remaining unwanted hair. To get started, make the your hair prop is selected in the scene tab. Now right click in the scene to bring up this menu:
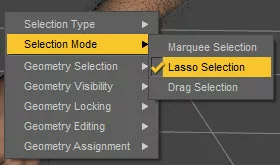
Ensure you use Lasso Selection. Now you can simply drag a circle around any hair that you want to hide. Don’t worry if you make a mistake, simplye drag out a new circle to make a new selection. If you look carefully you can see a red dotted line appear around our selection below.
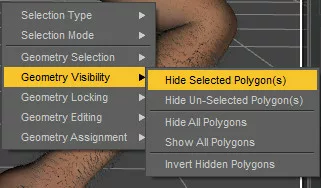
Now for the very final step! Right click in an empty area again and this time select Geometry Visibility -> Hide Selected Polygons. This will terminate any of those last remaining hairs!
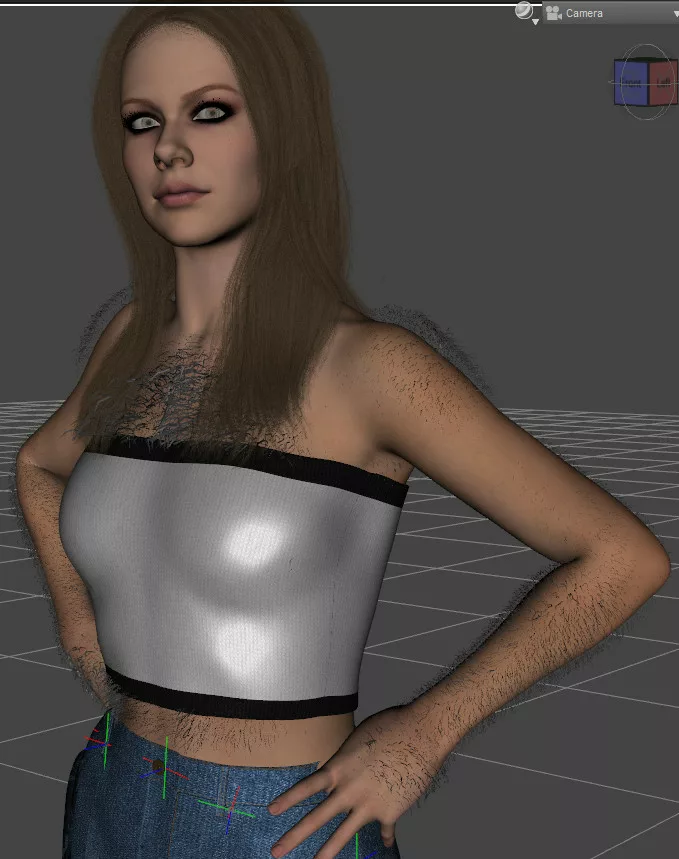
Here is the final result. As you can see, we have quickly removed all unwanted Geometry and we can now render our scene.
We left the amount of body hair at a nice length here but for those of you who want to see HID Ariel in werewolf mode, here she is with the hair length setting cranked all the way up and extra gravity!
You can apply these skills to removing anything you want from your scenes in a precise manner. This could be clothing, accessories or anything else! We hope you have enjoyed this tutorial and learnt some useful 3D skills!