
How Do You Use dForce Hair in Daz Studio?
This tutorial will show you how to get up and running using dForce hair in Daz Studio. We will cover the following key areas:
1. What is dForce?
A quick browse of the Daz3D store today revealed over 1320 dForce products! There are also 1000s more third party products on other marketplaces that make use of Daz’s dForce technology. So what is dForce?
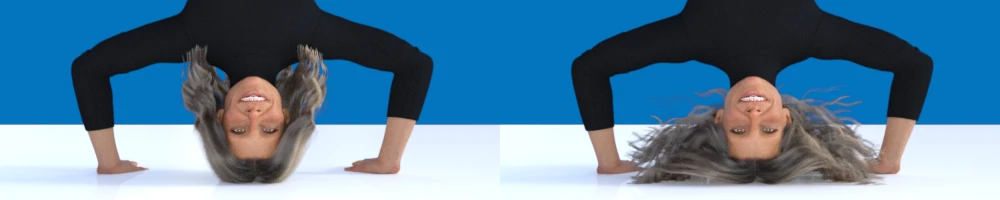
DForce is a newer feature of Daz Studio that is used to simulate the effects of gravity and air resistance on hair and other soft materials such as clothing and blankets etc. If you will, Imagine your Genesis 8 character was doing a headstand and their hair just remained exactly the same like it was made out of plastic. Dforce will make your rigid 3D hair prop fall beautifully into place and look natural!
If you haven’t yet started to use dForce in your 3D renders or animations you are missing out on a fantastic way to add realism to your digital art. This tutorial will focus on how to use dForce with hair in Daz Studio. Lets get started!
Note: The team over at Daz are always working to expand the capabilities of Daz Studio. It is likely that dForce will continue to be worked on and improved in the future.
2. How to Use dForce Hair
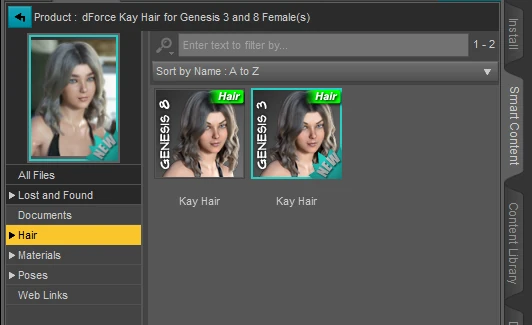
The first step is to open up Daz Studio and add your character into the scene. Next add your chosen Hair prop to your character. For this example we will use dForce Kay Hair for Genesis 3 and Genesis 8 Females. This prop is compatible with both Genesis 3 and Genesis 8 characters so be sure to select the correct one.
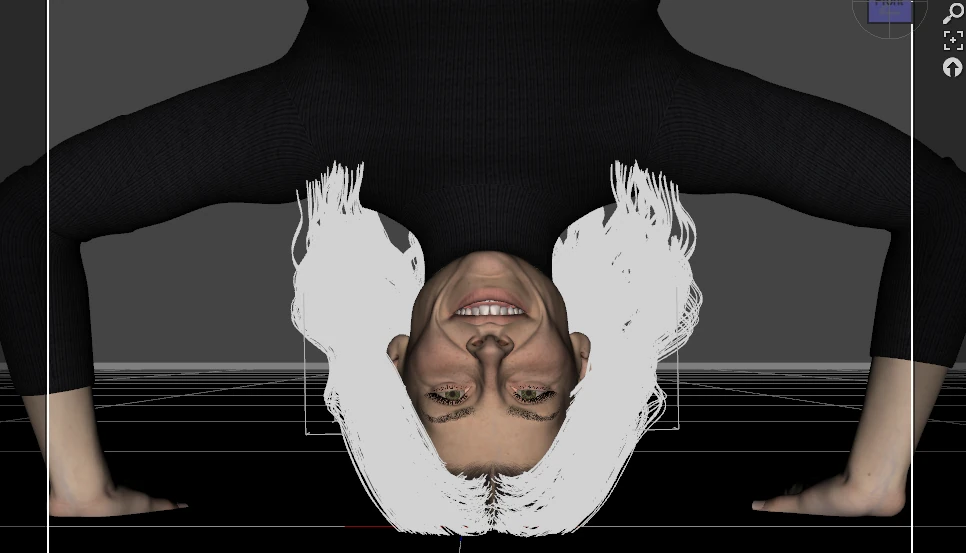
After you add this hair prop you will instantly notice that the hair looks bright white and a little sparse in the viewport (more on this in a moment). It also appears a little poofy in shape! This is nothing to worry about as we will be correcting the hair shape when we apply the dForce simulation.

Furthermore if you try to use Nvidia Iray Draw Style mode the main hair wont render at all. You will just see the skull cap portion.
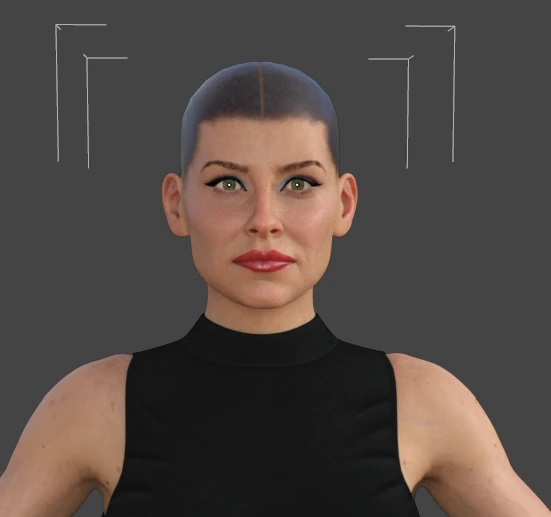
This issue doesn’t actually affect actual renders, as the hair will appear correctly when finally rendered. But Daz Studio previews the hair this way in the viewport to save valuable memory.
Making Dforce Hair Visible When Using the Nvidia Iray Preview Mode
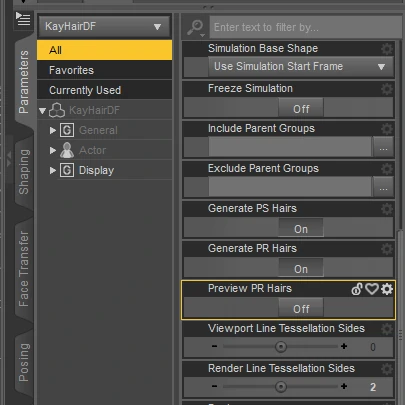
If it is an issue for you, you can alter two settings to make the hair show up in your viewport. These are the Preview PR Hairs and Viewport Line Tesselation Sides settings. To begin with ensure you have KayHairDF selected in the scene tab as shown in the image below. Note: This is hidden underneath the main hair in the scene tab.
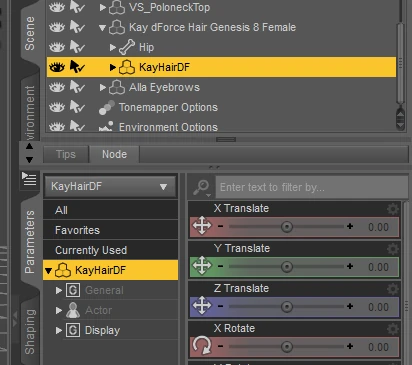
Next Select the Parameters tab and navigate down to the Preview PR Hairs and Viewport Line Tesselation Sides settings as seen below. You can then optionally choose to turn on on the Preview PR Hairs. This will immediately make the hair appear denser in the viewport but it will still look incorrect untill you set the Viewport Line Tesselation Sides setting to around 2. We caution you heavily to only turn this up as little as necessary as it will quickly hog your memory and resources and probably cause Daz Studio to crash! Personally we never bother to adjust these settings as they don’t have any affect on your finished renders.
Running the dForce Simulation on the Hair
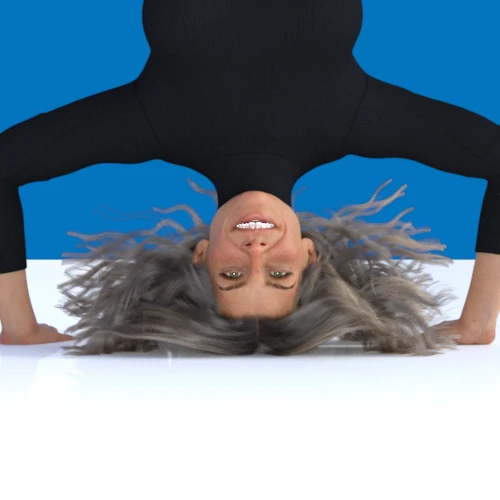
Now it’s time to pose your character and apply the dForces simulation to the hair. We will show you how we achieved the “headstand hair” image featured at the start of this tutorial. As can see in the image below, we have rotated our Genesis 8 Female Character and posed her arms downwards. Their is a Primitive Plane that has been enlarged and used as a ground surface. By default dForce will cause the hair to collide with everything in the scene that is not hidden.
Next head over to the Simulation Settings Pane. There are a few adjustments to be made here:
- Increase Gravity to “2.0”. This setting works as you imagine, the higher it is set the heavier the downwards force on the hair!
- Turn Start Bones for Memorized Pose to “Off”
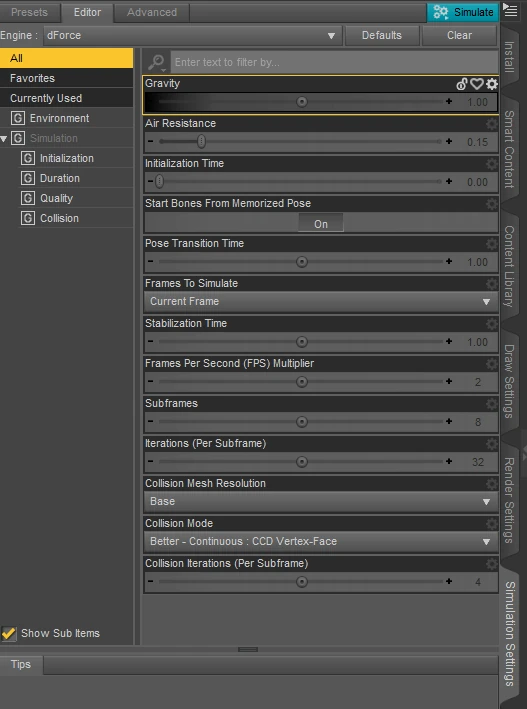
Hit simulate and we are all done! Finally here are the results:
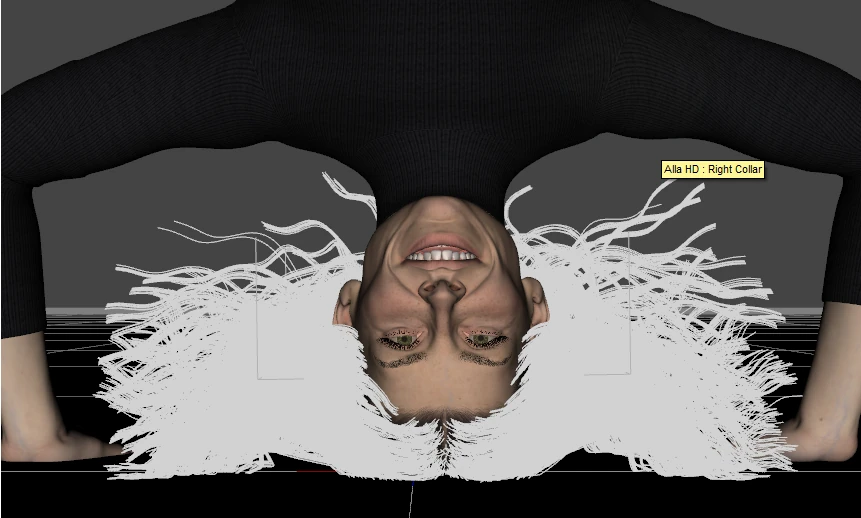
Final rendered image (blue background added in image editing software):
3. Convert Regular Hair to Dforce
You may already have many regular hair items in your library and wish to use them with dForce. This can be an excellent way to breathe new life into your older items and the results can be superb! In this section we will show you how to convert these items to be compatible with dForce. We will also show you the various pitfalls you may encounter when attempting to upgrade these items. Read on to learn more!
Choosing an Appropriate Hair Prop
The first step is to load up a scene with your chosen character and the hair you wish to convert. For our example we will be using Genesis 8 Female and we have decided to use “Phoebe” hair, which is an older hair prop designed for Genesis 2 Female.
The reason for this choice is to demonstrate how dForce can be used on just about any hair prop when the correct techniques are used. It is also much faster to run the simulation on older items. This is because the Geometry of these older items is far more simpler. As computing power has increased, 3D models in general have become much larger and incorporate vast amounts of polygons, edges and vertices. This is an important thing to consider when choosing your own hair items to convert.
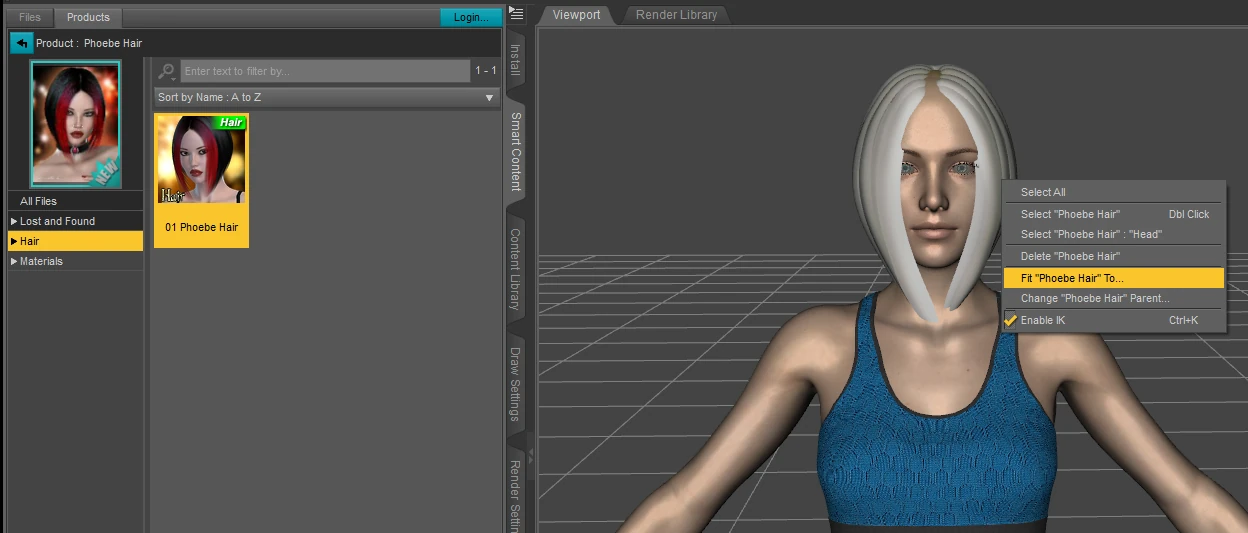
If you are using a hair prop that isn’t designed for your character, don’t forget to parent the item by right clicking the hair and scrolling down to the “fit to” section as pictured below. Then simply follow the prompts that guide you through the autofit process. Next add your desired material and we are ready to start adding dForce!
Applying the dForce modifier
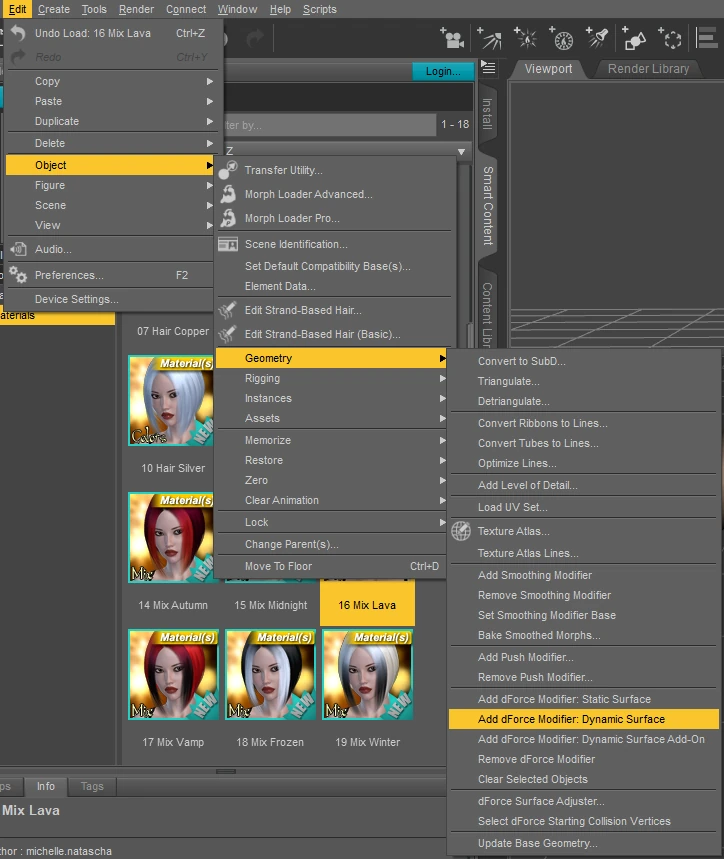
- Make sure your hair is selected under the scene tab.
- Next go to the Edit menu and select Object –> Geometry –> Add dforce Modifier: Dynamic Surface. This will add the dForce properties we need to the hair, but if we were to run the simulation now the results would be awful! This is because there are parts of the hair that we do not want to have move around. If we don’t have a way to tell this to Daz Studio explicitly the hair prop will turn into a monster from the thing! Thankfully we have weight maps to help us with this.
Weight Mapping the Hair
This is our favorite part, as its our chance to get really creative! We get to select the parts of the hair that we want influenced by dForce. This means we can have lots of fun experimenting and create a huge range of different looks from our old tired hair prop.
- To get started, we are going to hide everything apart from the hair in our scene by clicking on the eye symbols in the scene tab.
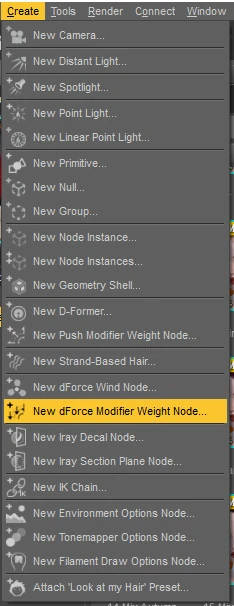
- Make sure the hair is selected and go the create menu and select New dForce Modifier Weight Node. You can choose to rename the node if you wish in the next prompt but we will just leave it as default for now.
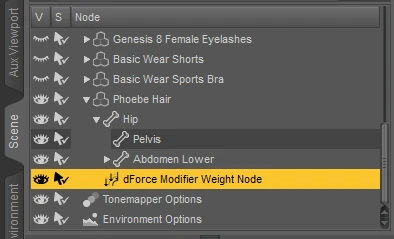
Now if you go over to your scene tab you will see the new weight node as pictured below.
- Now it’s time to activate the Node Weight Map Brush. Either select this under the Tools menu or alternatively you can use the shortcut keys of ALT+SHIFT+W.
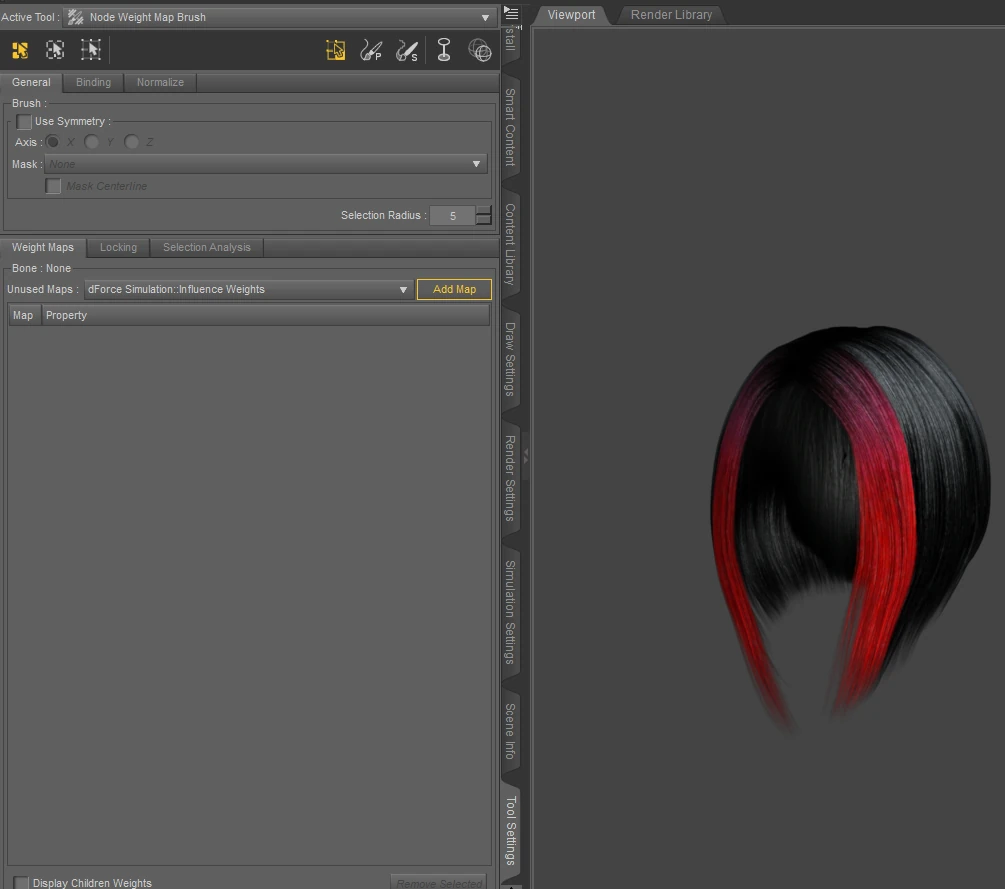
- You then need the Tool Settings Pane open. If you haven’t used this before you can find it under Window –>Panes(Tabs). Phew! We are all set up to start painting our weight map now.
- Ensuring we still have the dForce Modifier Weight Node selected, click on Add Map in the Tool Settings Pane.
Selecting Geometry to Remove From the Weight Map
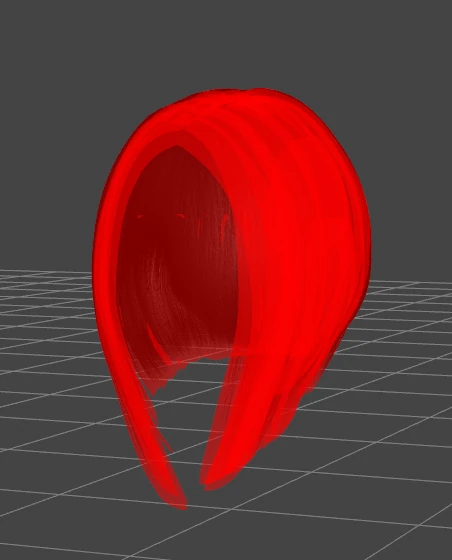
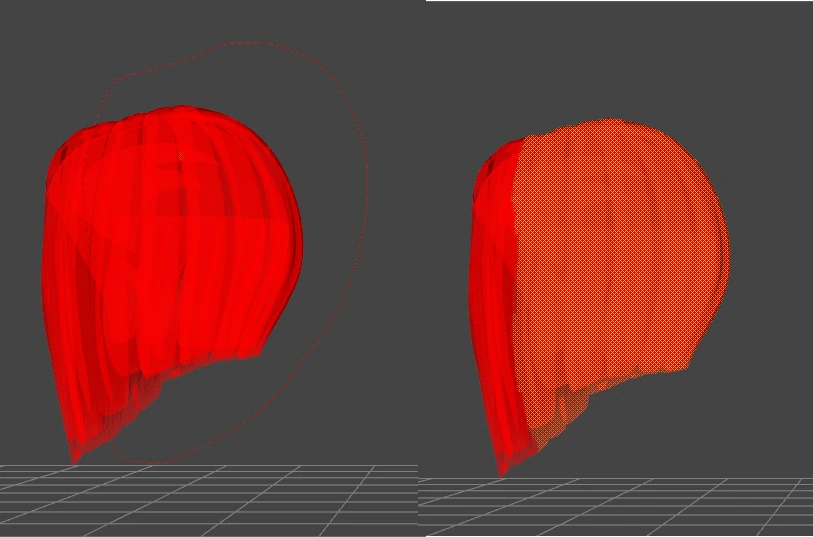
You will notice your hair prop turn red to show that the weight map is activated. All of the brightly colored areas will have dForce acting on them. This is not what we want as it will just turn our hair into a mess. We need to decide which regions we want to react. In this case I have decided that I only want the front portion (bangs) to react to dforce. To achieve this I will deselect the other parts.
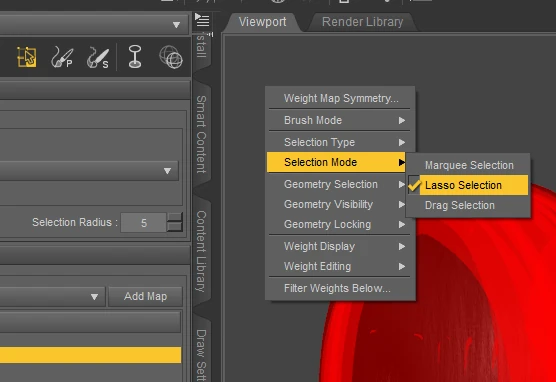
- Activate the Geometry Selection Tool for the Node Weight Map Brush by clicking the icon pictured below or using the shortcut SHIFT + L. I have also changed the selection mode to Lasso to make the selection process much quicker and easier.
I have turned my hair prop to the side view. I can now easily selected the region I want to remove from the weight map by holding the left mouse button and dragging the lasso selection around it. This tool will select all the way throught my model in one move which saves huge amounts of time!
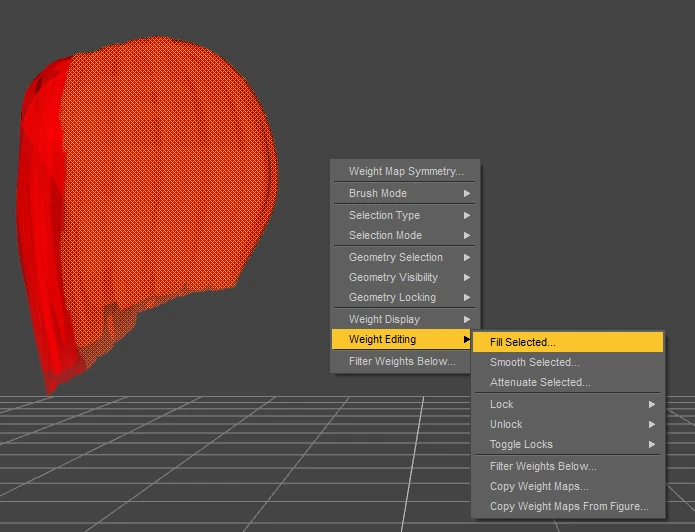
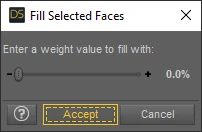
The final stage is to right click in the viewport and select Weight Editing –> Fill Selected… In the next dialogue ensure that the value is 0.0%
Thats everything done! Now you can run the dForce simulation and assess the results! Be sure to experiment with different weight maps and values in the simulation tab to achieve the look you want.