
PBR, or Physically Based Rendering, is a method of rendering 3D objects to simulate real-world lighting and materials. It allows for highly accurate and realistic rendering, making your creations look as photorealistic as possible. In DAZ Studio, PBR is available through the Filament rendering engine, which works in real-time to provide instant feedback on changes to lighting and materials.
PBR is also in the new Daz PBR skin shaders. These are a new generation of more realistic shaders created for the Genesis 8 Generation and above. Their purpose is to make photorealistic rendering really easy for even beginners to do.
So, let’s dive in and explore everything you need to know about PBR in DAZ Studio!
Tutorial Menu:
Filament PBR
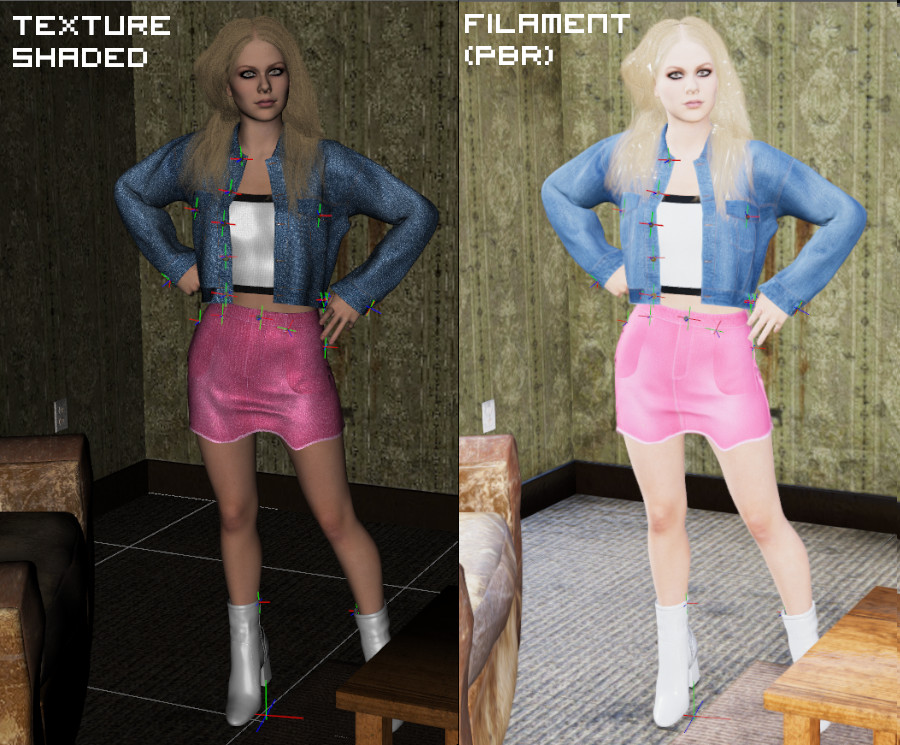
To begin with lets talk about Filament is used for. According to the official Daz3D page on Filament, it is used to provide real-time rendering in the Daz Studio viewport. Yes we have other tools such as the Nvidia Iray Drawstyle option, or the spot rendering tool. But unless you are on a super powerful computer, these tools are significantly slower than Filament.
Dont believe us? Let’s give it a try! Here is Genesis 9 in the Daz Rundown Apartment scene. As you can see, things look very different when using Filament PBR. The lighting and textures are rendered much more realistically. And this is without any Iray rendering happening, the computer is doing very little work to create this effect. This is a massive advantage if you are on older hardware as many hobbyists and 3D artists are.
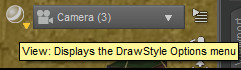
Turn on Filament in the Viewport
Turning on Filament is very simple. Access the View icon located in the upper right of your viewport and select Filament PBR from the dropdown menu. If you are unfamiliar with the basic Daz Studio options please see our tutorial: Daz3D Shortcuts and Time Saving Tips. But because we are nice we will show you how to do it in the image below:
You can add lights to your scene and experiment with different settings in order to accomplish the look you want.
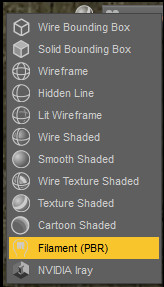
Quick Tip! If you want to render a scene with Filament, there is no dedicated Filament option under Render Settings which may cause confusion to some users. Simply make sure that you are in Filament draw style mode. Go over to the render settings tab and select Viewport. Thats it! Anything you render will come out super fast in Filament style!
All of the settings that apply to Nvidia Iray also affect how Filament is looks. This brings us to our next question.
What is the difference between Filament (PBR) and Iray?
Filament does not replace Iray. They are different renderers and have different features. Filament is all about speed and can render about 10x faster than other engines. There are some notable differences in appearance. Filament doesn’t show shadows. It’s designed to render quickly and easily without overtaxing your system so it has to make a few computational sacrifices! Following the same logic, some Iray skin material settings won’t show up either. There are several incompatibilities between Filament and Iray but some 3D artists have begun addressing this.
Filament Animation – The future?
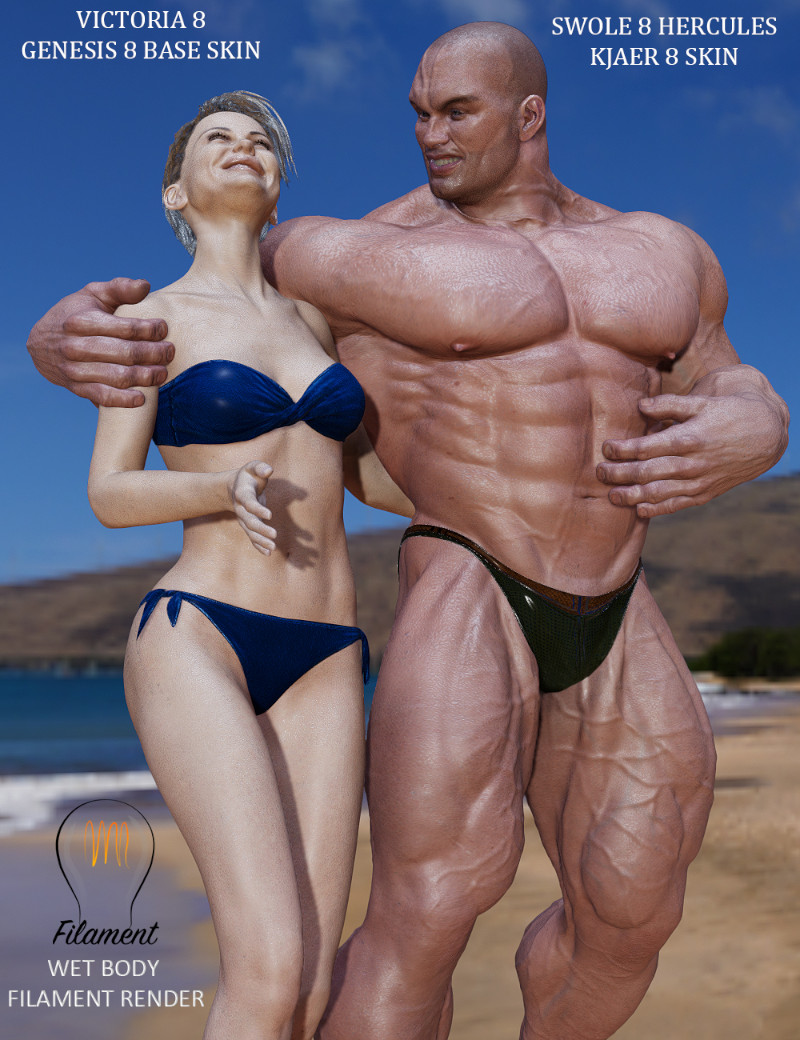
As things progress, its only going to get better for Filament. For example here is a wet skin shader designed for Filament. You can check it out yourself by clicking below. To render out a scene with wet skin using the Iray engine and materials could take hours. Filament renders instantly allowing for fast gorgeous animation in the viewport. And looking to the future, one of the best uses of Filament will be for instant animation! The possibilities are huge! Their are also new products coming out that can simulate shadows and environmental effects in Daz Studio.
So we’ve learned that PBR’s use in Filament. Lets take a look at PBR skin shaders in Daz Studio.
PBR Skin Shaders in Daz Studio
As we mentioned earlier PBR technology is also featured in the Iray PBR shaders. It was introduced with the Genesis 8 Generations and allows for ultra realistic skin that reacts to light just like it would in the real world! (Or as close as we can currently get!). This is especially useful because you quickly get beautiful results without spending hours tweaking lighting etc. It’s also good for beginners who don’t have the knowledge to fine tune scenes. Lots of newer characters now come with PBR base materials already. But if you want to add it to a character we will show you how.
Adding PBR Skin to Genesis 8 and above
Alright, listen up fellow 3D artists! Before we dive into applying PBR Skin to your Genesis 8 or 9 character, make sure you have the latest version of Daz Studio and the latest package update for Genesis 8 Male/Female Starter Essentials.
Now, let’s get started. Load up your Genesis 8 character, and head over to the Surfaces pane. Select the character’s Skin and Lips or whichever specific surface you require.
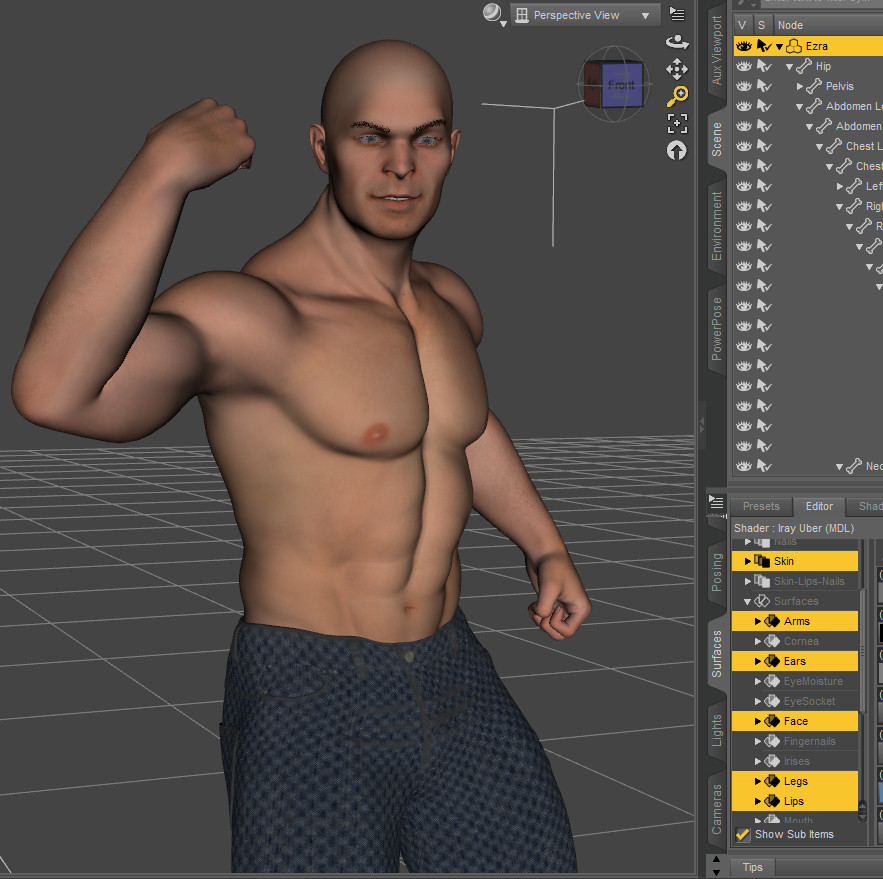
You may notice in the image that at the top of the surface tab it currently says Shader: Iray Uber. Next you can try to search for “Daz PBRSkin” in your content library or you should find it under My DAZ 3D Library -> Shader Presets -> Iray -> Daz PBRSkin. Once loaded, your character may look like very pale in Iray.
Type “Enable” into the search box within the Surfaces pane, and turn on Translucency Enable for a transparent effect.
Next, turn on Transmission Enable and SSS Enable at the bottom of the list.
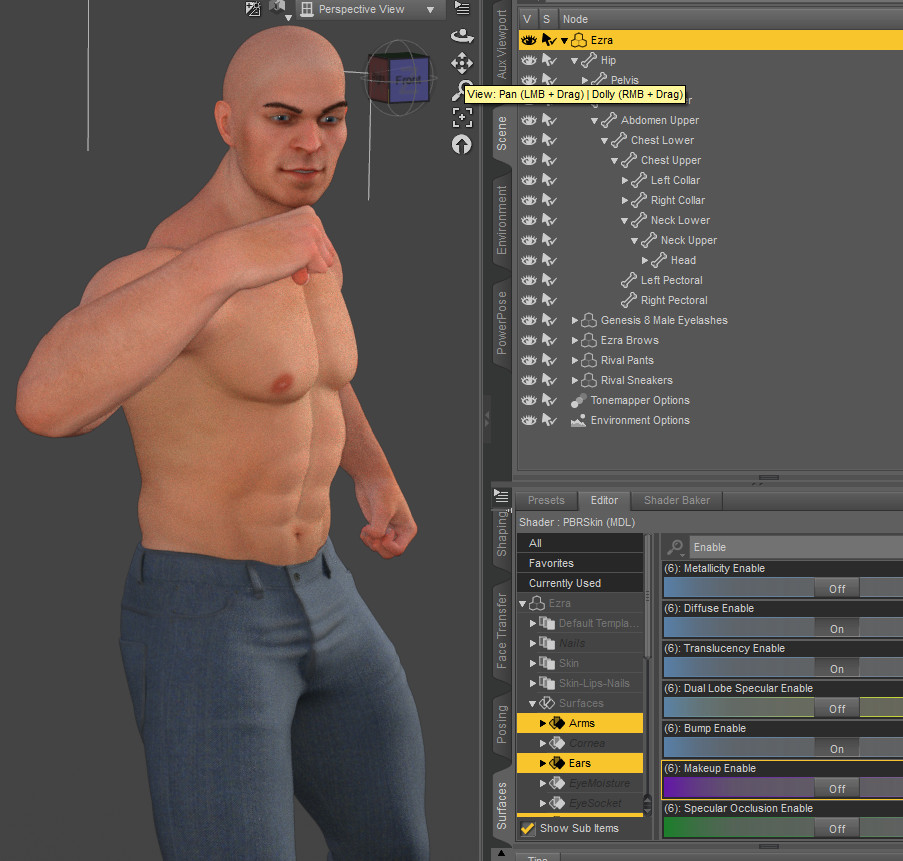
Turn on Specular Occlusion Enable if your character is looking too shiny.
Finally, turn on any other shader features your original skin material used, such as Bump and Dual Lobe Specular.
For some unique skin materials or makeup, you may need to use Top Coat, Metallic Flakes, and/or Metallicity. And voila! Your character should now have a PBR Skin shader applied. Don’t forget to adjust the settings to achieve your desired look.
We hope you found that quick tutorial helpful, and you are now much wiser about What PBR is in Daz Studio! See you in the next tutorial.