
6th June 2022
The Daz to Blender Bridge allows you to easily transfer Genesis 8 and Genesis 3 characters from Daz to Blender. It is extremely easy to use and free. The tool also transfers and converts all rigging, materials and just about everything else for you! This opens up an entire world of customisation possibilities for Daz Studio users. It also offers Blender users a huge injection of awesome content. Here is a step by step guide to help you get the most out of the Daz to Blender Bridge.
We will be updating this tutorial with all the latest features as they are released so check back regularly for more updates to the Bridge.
Did you know: Daz3D has made six bridges to date. These include bridges for Autodesks Maya and 3DS Max applications. Also Blender, Unreal Engine and Unity.

Install the Daz to Blender Bridge
You first need to download the tool here:
https://www.daz3d.com/daz-to-blender-bridge
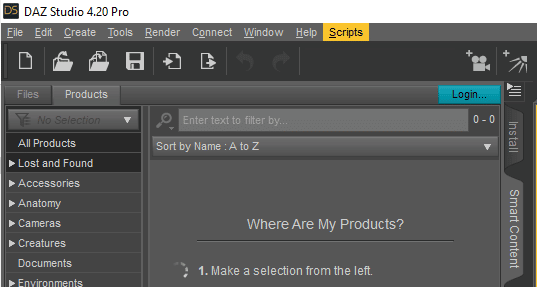
Just make sure you’re signed in and then add it to the cart. Don’t worry it’s free you just need to check out and then you can install it using Daz Central or the Daz Install Manager. When you open Daz Studio you should then see a Scripts tab appear at the top. This only usually activates when you have content installed that makes use of it.
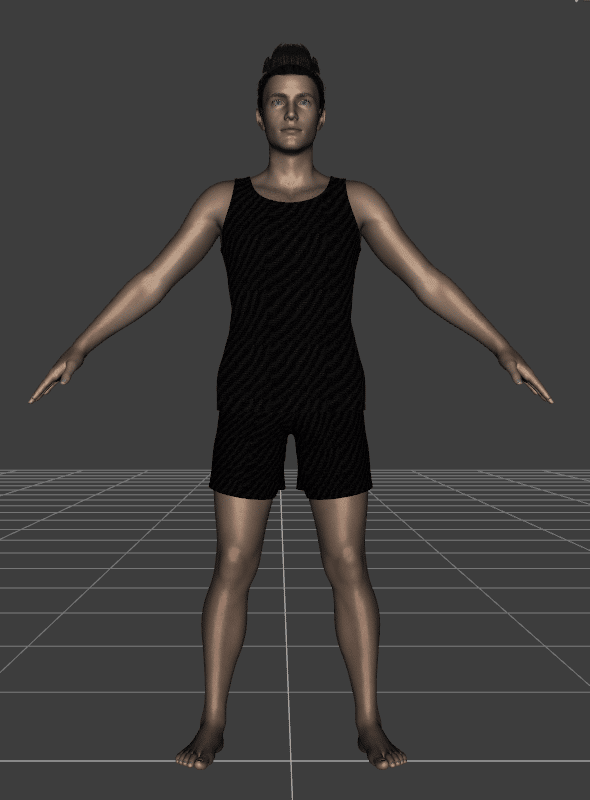
We can leave the scripts tab alone for now. The next thing to do is add the content you want to transfer over to Blender. In this case I will be simply loading a Basic Genesis 8 Male character with Essential wear and the default Armani hair prop into Daz Studio. It’s important to note at this point that you could also add an Environment or Prop which can also be transferred to blender. The Bridge lets you choose what specific content you want to transfer over.
When you are happy with your scene go back to the scripts tab and navigate to: SCRIPTS > BRIDGES > BLENDER.
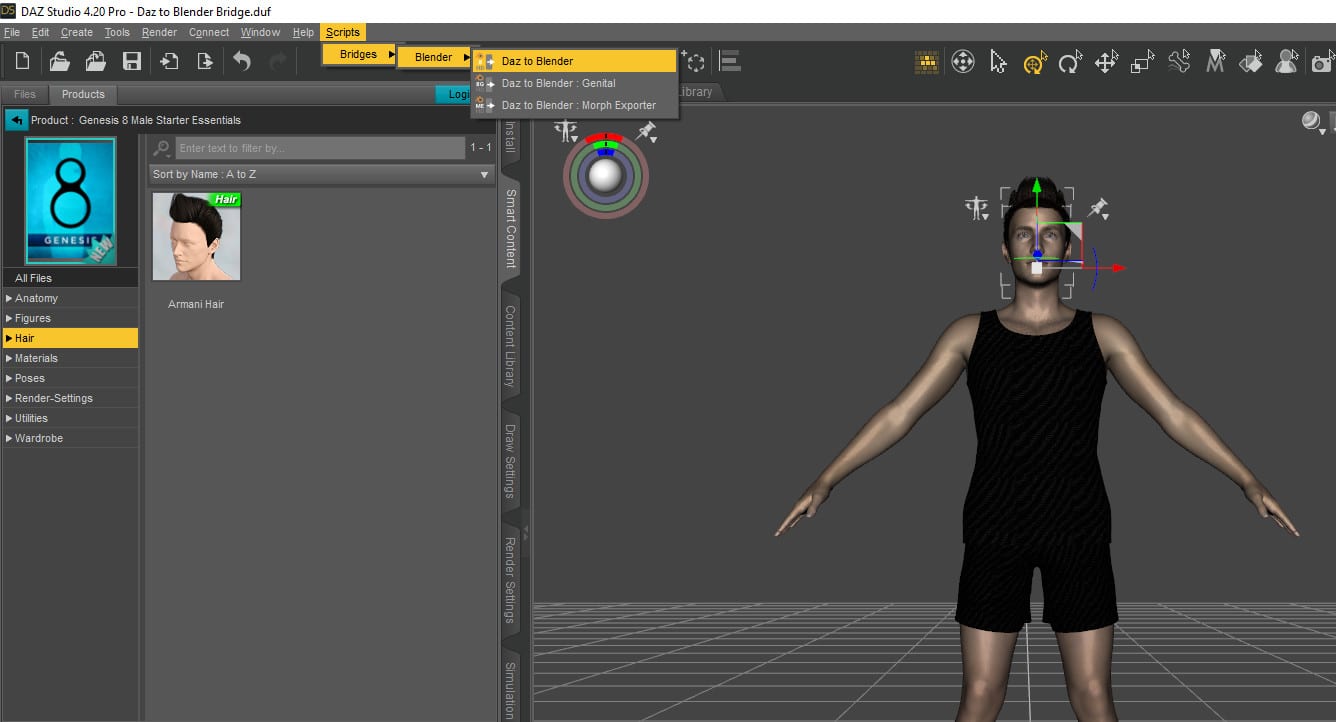
Click on it. If this is the first time you have used it you will get a prompt informing you where the Daz Bridge data is saved etc. You can accept this message and move on. Next you will see the following prompt:
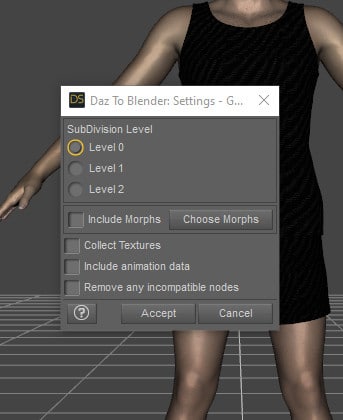
This prompt asks you what SubDivision Level you want to use. Select the first option (Level 0). Everything is now set and you can click accept. It may take a few moments to run depending on the complexity of your scene.
Importing your Daz Studio content into Blender
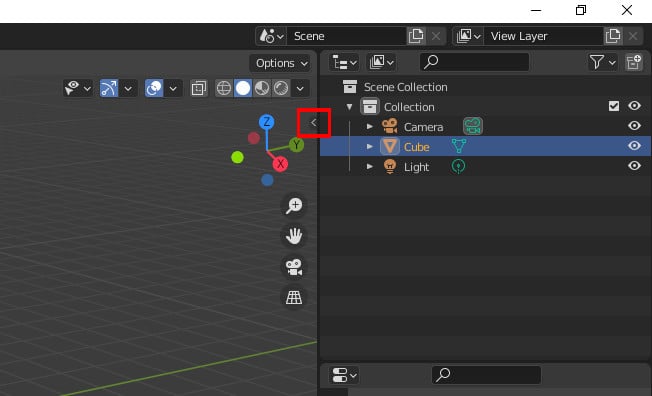
Time to open up Blender! First click on this arrow in the top right corner.
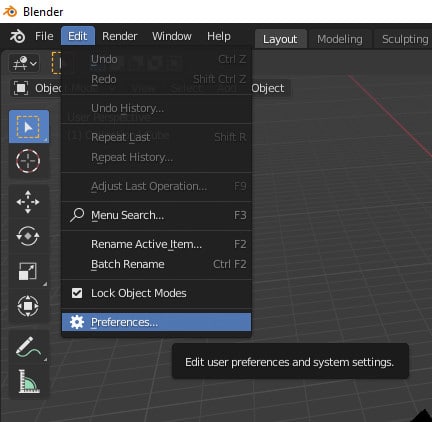
If you see an option for the Daz to Blender bridge then everything is good! But on most occasions you will need to activate the bridge within Blender manually. To do this simply head over to the preferences tab. EDIT > PREFERENCES:
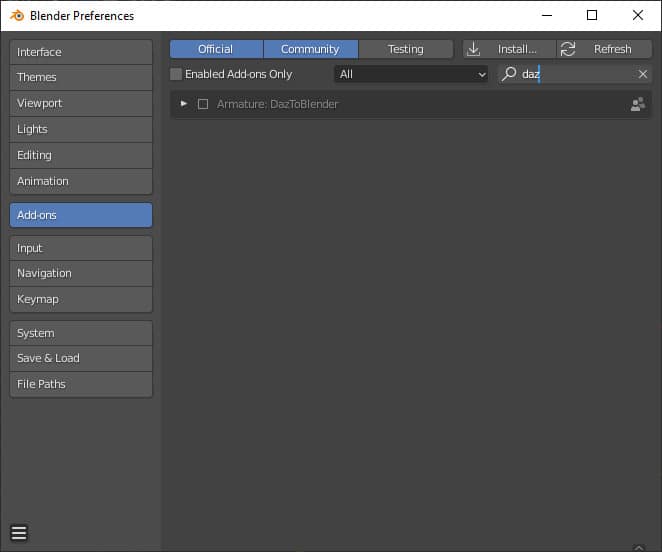
When the Blender preferences dialogue pops up, select Add-ons from the left hand options. Next type Daz into the search box untill you locate the option: Armature: DazToBlender. Make sure you select the box next to it and you will now be able to access the Daz to Blender settings from the menu in the top right corner, as we originally attempted!
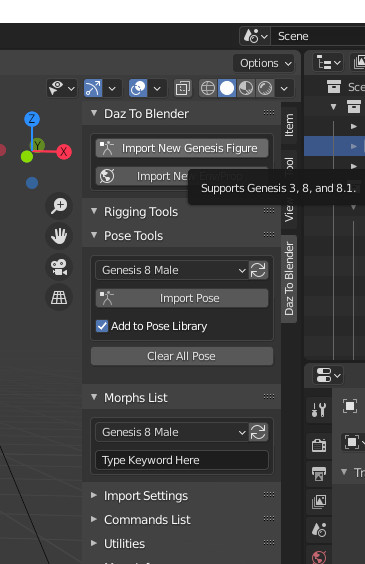
The last step is to simply hit the “Import new Genesis Figure” option and thats all there is to it! Your content will appear in Blender and you can continue working on it as you wish. All materials and texture will also be present and you can click on the viewport shader settings to see them.
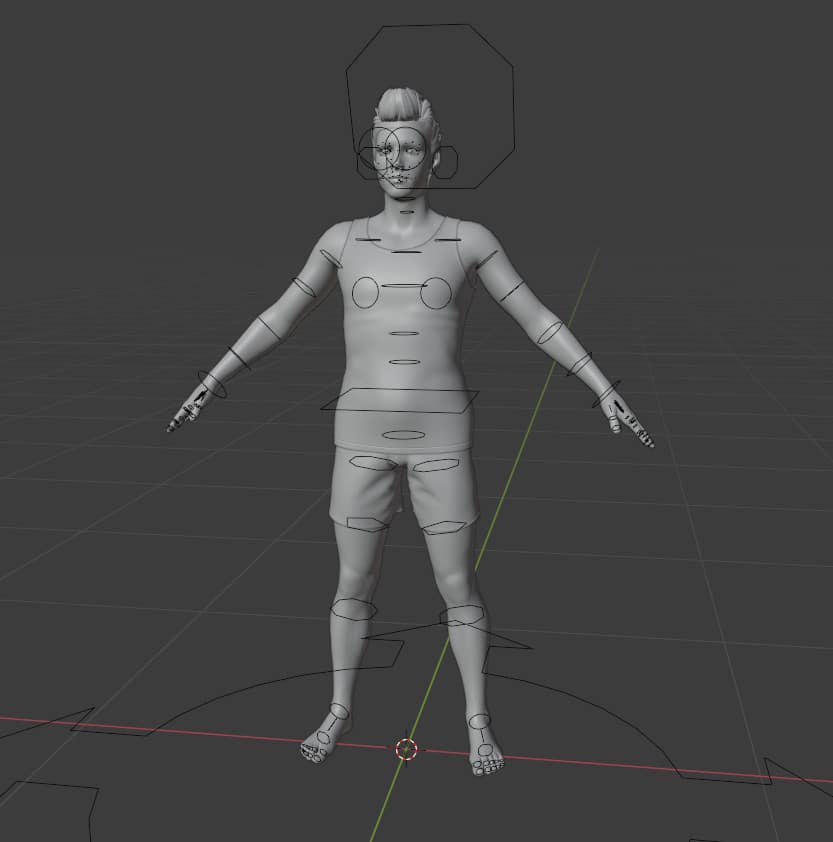
Troubleshooting issues with Transparency
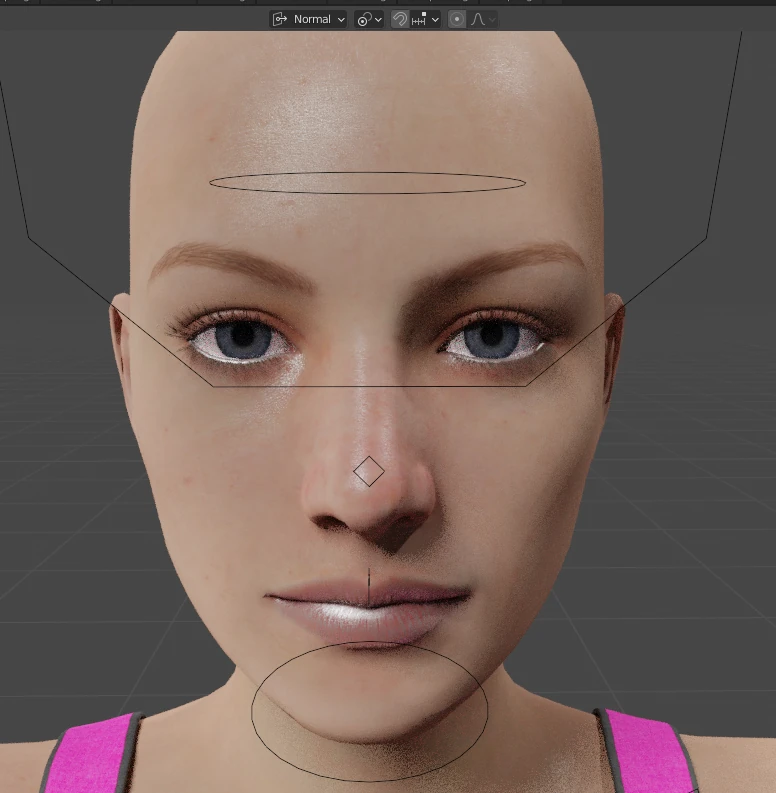
A common problem Daz studio users run into, is that afer importing their characters into blender, the eyes and other surfaces may appear white. The Daz to Blender bridge usually handles Genesis 3, 8 and 8.1 transfers flawlessly. But the bridge can also be used with older characters which sometimes causes problems. There is no need to panic though, this is a very easy problem to fix in a matter of seconds!
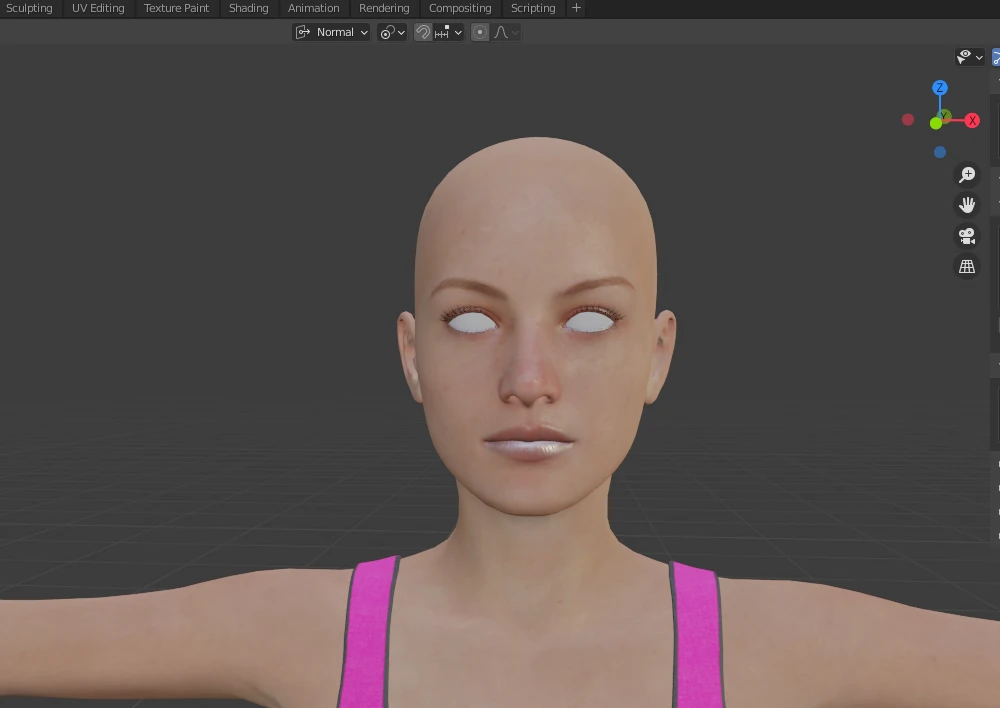
As an example, we will correct this issue on the Genesis 2 Female model. The image above shows her imported into Blender with Material view turned on. 1. click on “Genesis2Female.Shape”. This can be found in the the outliner menu on the top right hand side. 2. click on the Surface tab.
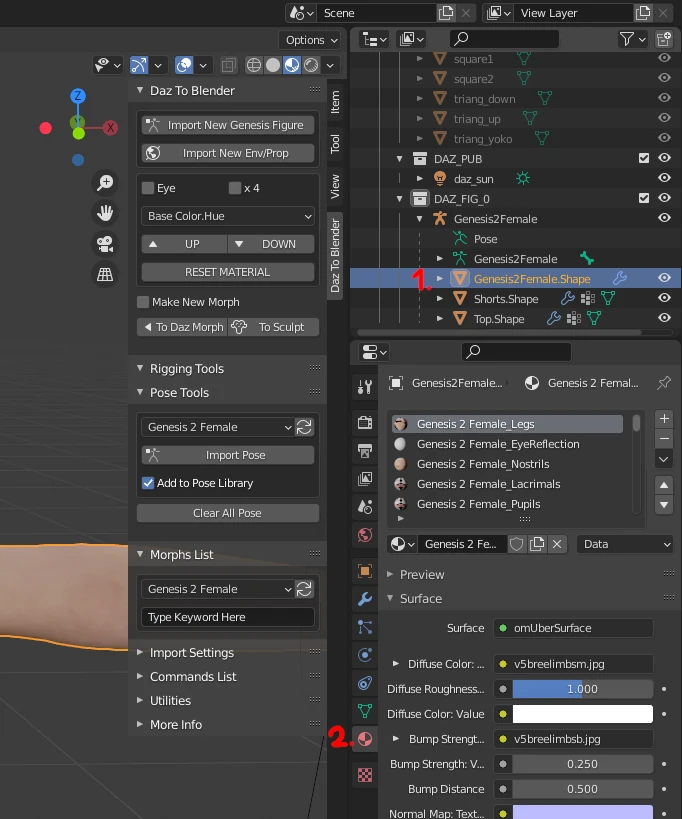
Adding a Compatible Shader
We now have access to the characters surface options. 3. click on Genesis 2 Female_EyeReflection. This layer is supposed to be transparent but has been transferred over with a white color. This is because the “Daz Studio Default” shader used is incompatible with blender.
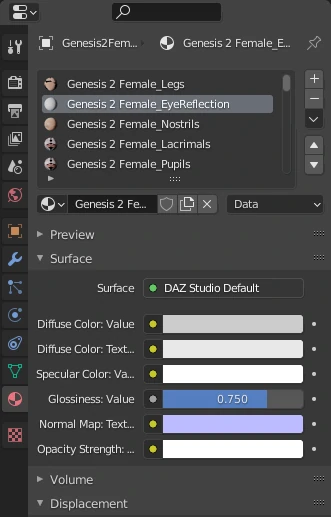
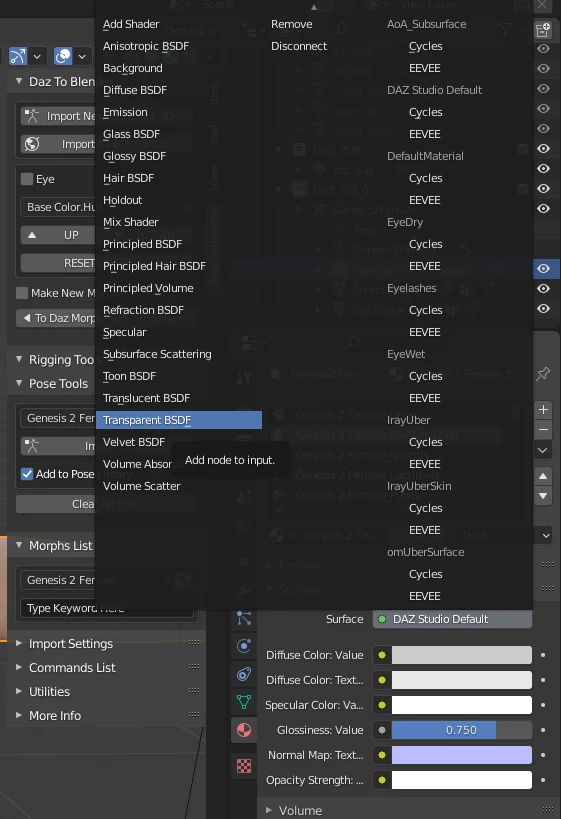
All we have to do is select a transparent Blender compatible shader for this surface instead. There are a few to choose from and you can experiment with what works best for you. In this case we will be using the Transparent BSDF shader. 4. Click on “Daz Studio Default” in the Surface tab. This will then give you a subwindow of options. 5. Select the Transparent BSDF shader.
You may notice the white surfaces turn black depending on the shader you select. But this will not affect your rendered image. As you can see below the issue is fixed!
Conclusion
You can see how super fast and easy it was to use the Daz to Blender bridge. If you have any questions feel free to post a comment below. We will be expanding this tutorial in the future to include a video and address more technical aspects of the Bridge. Have fun and create something awesome!